Friday, November 28, 2014

The hidden meaning of being thankful for Legos


My son brought home a Thanksgiving Day card from school last week. On the outside there was a little turkey made by pasting layers of colored paper on each other and some googly eyes. On the inside was a fill in the blank "I am thankful for ______." Mikey had chosen "Legos" and written the word in his best pen. Beneath his filled in blank, an adult had written "and Momma, and Papa and baby sister." I smiled but wondered why the family was added second. Did Mikey add it as an aside or did the teacher coach him? It matters not (much) but I wonder: if the teacher knew the true meaning of Mikey being thankful for Legos, then would she have felt the need to (presumably) add the family? 


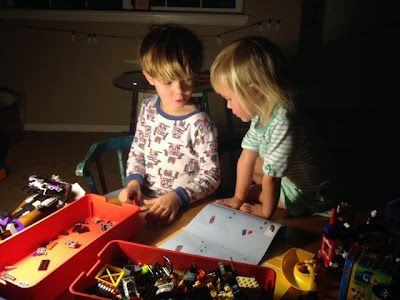
You see, about six months ago our family came into a set of Vintage Legos. With Mikey's atrocious fine motor skills, my husband and I knew that they would present very frustrating endeavor for our child. However, we also recognized that the mechanical interesting devices he could build might hold his attention. Sure enough, my husband spent a lot of time and a lot of patience teaching our son how to follow Lego instructions. Every morning the boys would sit down together and build. They would not finish a build in a single day but they would complete one or two steps. Slowly, very slowly, but surely Mikey's fingers became stronger and his attention longer; his confidence grew, too. Now Mikey can follow instructions for Lego sets designed for children twice his age! He still doesn't necessarily complete a build in one sitting but he doesn't REQUIRE his father's instruction/attention to do it. He can do it all on his own. 

But he doesn't do it all on his own. Mornings are still for building together. We all roll out of bed together and turn to the toy room. The children sit together working. Mikey gives Anna jobs. (For example, "Here Anna, put your finger here and help me push them together." "Anna, can you find this piece (pointing to a picture)?") My husband and I watch, coffee in hand, happily. All of us are rested, relaxed and enjoying our family time together before the rush of the day begins with breakfast. 

So when my son said that he was thankful for Legos, I did not think he was referring merely to the toys (although maybe he was). I let myself think of those special family times that revolved around building set after set of Legos. I also remembered something I wrote a couple years ago about toys:

The value of a toy is not merely in the having of the toy; it is realized when a child plays. The right toy played with at the right time elicits the joy and wonder of learning.

Wednesday, November 26, 2014

Small Toys

I've come across a handful of small toys that have been big hits in our place. Here are more small toys  (in this season, labeled stocking stuffers) for you to think about...


Party Bath Light. I discovered this toy at Michaels but I don't recommend buying it there. The price tag is $15 and is exempt from all the coupons. It is only $9.50 on Amazon so if you have time to wait for it to ship then I would head over there. This light is water proof and has provided a lot of giggle in the dark and in a dark bath. The lights change colors and provide a pretty cool light show both above and under the water.


Target Party Favors. If you find yourself in Target then consider swinging by their "party favor" section to find a handful of mechanically interesting toys for under $5:

Grabber Claw $3.


Propeller Launcher $3.


Top $2.
Spinning Top

Assemble Your Own Straws
- A version of these are available at Target as Spritz brand party favors but I can't find it online. Just keep your eyes peeled...or buy them at Fat Brain Toys...
- NUOP makes some available at Fat Brain Toys.

Sunday, November 23, 2014

Child's Play is Valuable

Last week I shared a link to pictures and a video of Aelita Andre’s work. She has been labeled as an artistic genius. But like many abstract artists, her worked is judged by some as child’s play. I have been thinking a lot about how she has taken the world by storm and struggled with my own paradoxical feelings. I find some of her paintings really beautiful but I also recognize her process as child’s play. And after tumbling it around in my head, I have decided that the most important thing that could come from Andre’s success is the idea that a child’s play is serious, it is brilliant, and, when allowed to self-direct and explore, a child is capable of more than we typically give them credit for.


 Aelita Andre’s parents who saw value in her first smear when she was nine months old. They stepped back and let their child explore very deeply in what drew her interest. As a seven year old, she has a resume that rivals adult artists. She has sold out art shows and been recognized by arts scholars as a genius. Genius? Really? Perhaps… 

…Perhaps not. Maybe she is just lucky to have so many people value her process AND her product. I chuckled when I watched the video montage of her process and products. I marveled about how powerful music and beautiful videography made her work seem superb. I don’t mean to discredit her talent because I found some of her paintings truly moving. However, I think that music and videography could transform almost any child’s work/play into something more substantial and seemingly more valuable. 

And that is the point for me. Like all children, Aelita Andre’s process and product are valuable. But I guess valuing a child’s process is rare. It is so rare that A had an audience of 20,000 people watch her paint! Having adopted Magda Gerber’s tactic of watching my children play, I couldn’t believe that watching a child paint could draw such a crowd. Have those people never watched a child play? Have they never seen the value in child’s play? It seems a little absurd to me. But here at preschool engineering, I  advocate the value of child’s play. I try to help you see the pre-STEM learning that can happen in sandboxes, at the beach, in the kitchen or just on the floor of the living room. And I don’t anticipate that all of us have children who will create art, build sculptures, or otherwise hone their craft to the point of world-renowned fame. However, if we value our children and their play then they will earn family-renowned fame and that will be enough. 


Monday, November 17, 2014

Comment on "7 Myths That Discourage Independent Play"

I just reread the post by Janet Lansbury - Elevating Childcare titled "7 Myths that Discourage Independent Play." She lists seven misconceptions about what infant play looks like and then describes the hows and whys of the play. I wish I had read this back in 2009 when I had my first baby. (Especially #7.) And today I share the bullet list with you and offer some insight from my perspective.

Play Myth # 1: Babies can’t do it.Play Myth #2If a baby cries when she’s placed down, she must not like playing.
Play Myth #3Play means “doing” something.
Play Myth #4Gated play areas are restrictive “jails”.Play Myth #5Independent play means leaving children alone.
Play Myth #6When children get frustrated or ask for help, we should solve the problem for them.Play Myth #7It’s our job to entertain and play with our children

These all apply to preschoolers as well as babies. However, if you and your preschooler are new to this style of parenting/childing then there will be some growing pains. For us, the combination of #3 ("doing" something) and #7 (my role as a parent) was where my child and I struggled for a long time. It seemed like he had a very hard time knowing what to do without me sitting beside him doing something he could observe. So we had to ease into it. When he wanted me to build for him or otherwise "entertain" him, I said "let's do it together. I'll put one block on the stack, then you put the next one." There was disagreement. He wanted me to do more than I would. Sitting and watching him didn't seem to be enough to meet his needs. However, I borrowed a line I learned from Janet. "I like to watch you play." That simple phrase seemed to comfort him. It seemed to encourage him to know that his work was valuable and that merely observing it was enough to make it so.

This brings me to my next point. Janet wrote

"Often the richest, most productive play doesn’t look like much because it’s dawdling, imagining, daydreaming, big picture thinking. To encourage this kind of play we must: first, value it; second, observe it; and lastly, not interrupt..." 

My aim here at Preschool Engineering is to help you see the value of your child's play. Nevermind that independent child's play means you get freed up to do work, chores, enjoy a beverage in peace. That could be considered valuable enough. But there is more value in your child's play. They are building a foundation for science, technology, engineering and mathematics learning. Putting blocks together they are experiencing shapes, colors, and quantity. Identifying, sorting, and classifying toys and other household items is pre-Science learning. Nesting pots and pans on the kitchen floor is pre-Math when your child is comparing size and shape. Banging a hammer onto pretend nails is pre-Technology and pre-Engineering learning because he or she located a tool to use to accomplish something that needed to be done. Pre-STEM can be seen everywhere...and having had oodles of formal engineering training I'm here to help you see it.


Sticker Dress-up

When I was shopping for an activity book at the local bookstore, I looked over and was furious to find my toddler ripping stickers from a book of her own. Frustrated, I purchased the book. But I am happy to report a wonderful silver lining. The "Sticker Dolly Dressing" book by Usborne is a huge hit!

Our current homework routine requires that we all sit at the table and work. For my toddler, this Sticker Dolly Dressing book was a wonderful activity to work on. At first glance, I figured it was just a different context for her to play with stickers. But upon closer observation I noticed some preschool engineering learning available to her. First of all, the shapes are new. Shirts, dressing, scarves, and shoes are distinctly different shapes than our typical sticker supply which is primarily variations on circles (faces), flowers, and characters like TInkerbell. Second of all, the layers created by putting a shirt on the "dolly" first and then the skirt, sash, cape, and jewelry were pretty complicated pictures.

The engineering of the images and the stickers that Usborne did is pretty cool and provides, I think, a kind of visceral pre-engineering experience as the child works through the book. You can see from the picture that these South African women are dressed in a base layer as well as a cape and some headdresses. They also have jewelry on their legs and arms. This page started as a picture of three women wearing undergarments. A corresponding page with the stickers was marked with the page number and each woman had her own set of clothes. My daughter would choose the people she wanted to dress. Then I helped her find the stickers and told her things like "it says to put this shirt on [name] first. then this cape."

A page spread in the Sticker Dolly Dressing book.
Anna could not get enough of this Sticker Dolly Dressing book. Even when all the dollys were dressed, she still chose it as her canvas for homework sticker work. So, beyond the dolly stickers she began integrating new sheet stickers with the Sticker Dolly Dressing book. The work she was doing amazed me.

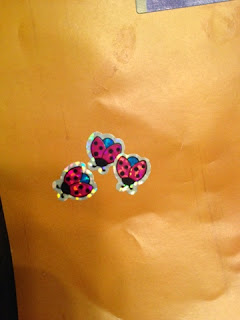
One night she chose a sheet of ladybug stickers. SHe didn't need my help for this so I just watched. She would peel the ladybug off the sheet and then look at the Sticker Dolly Dressing page and put the bug down. At first I didn't pay much attention to her. Then I started to notice some things. Anna had started sorting the bugs. She had a grouping of all open-winger ladybugs in one spot...

Open-wing ladybugs.

...closed-wing ladybugs in another spot...
Closed-wing ladybugs.
...and pink, open-winged ladybugs in yet another spot.

Pink open-wing ladybugs. 

At first I wondered if she was just copying the pattern on the original sheet of bugs but I don't think so. The ladybugs had been arranged on the ladybug sheet so that each set of 16 bugs had a green ladybug with open wings, a green one with closed wings, and so on for each colored ladybug. I saw a pattern but not one that screamed "this is how the ladybugs go!" My daughter had done her own sorting and classification of these bugs. Clearly, it is pre-biology practice because the stickers represented bugs. But also I think pre-math and pre-general science.

For Christmas, I snagged the "Sticker Dolly Dressing: Action!" book for my girl and the "Sticker Dolly Dressing: Extreme Sports" for my boy from the big list of books by Usborne. I found the Usborne page is the best place to peruse the possibilities where you'll see themes from everything from fairies to warriors! Then you can scour bookstores (brick and mortar and online) for the right one for your preschool engineer.

[Disclosure Statement: This post contains affiliate links. If you click and purchase, I receive a small referral fee at no cost to you. To see how I spend the money see my "Philanthropy" page. ]


Saturday, November 1, 2014

Birthday Favors - Miniature Engineer Stashes

We're celebrating around here. It is my son's fifth birthday and we are inviting some of his new friends from school to join us to play at the park, eat some pizza, and sing "Happy Birthday." And I know that party favors are sometimes the bane of existence as a parent...in fact, I struggle with whether or not they are truly necessary. But then I get inspired...and this year's favors are right along the lines of Preschool Engineering. 

First, a little history. When we read "Rosie Revere, Engineer" by Beatty, my kids were very interested on the idea that "when no one is looking she digs through the trash for treasures to add to her engineer's stash." Since Rosie entered our lives, we have a designated bin we call the "engineer's stash" that houses recycled toilet paper rolls, pipe cleaners, rinsed berry clamshells, etc.

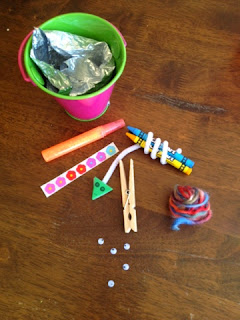
When I suggested that we give his friends their own "engineer's stash," Mikey was very excited. I am very excited, too. Here is a picture of the "Engineer Stash" that we've assembled: 


The bucket is the foundation. A bag could have worked but the play that a good pail provides is better, I think. We've also included a small ball of yarn (I crochet so I have tons of remnants around), a clothsline clip (because grabbing things are cool), glitter glue, crayons, some foil, googly eyes, stickers (flowers that resemble gears), and a pipe cleaner snake. My hope is that these items are used with the creative joy that glitter glue seems to elicit...

Before I end, I have to explain about the pipe cleaner snake. My original plan was to just use the pipe cleaner to wrap around the crayons so they wouldn't be all jumbled around in the bucket. Then we went to the zoo, where there is an extensive exhibit of snakes. That day Mikey fell in love with snakes. He said, "Mama, I think snakes are interesting because they move like conveyor belts." Enough said. Then, his classmate had a birthday and brought origami frogs to pass out to everyone in the class (this is in lieu of food because of new school rules for celebrating birthdays). I was amazed but thought, "yeah right. I'm not folding two dozen origami anything." That night over more conversation about snakes, I felt inspired. I wondered if we could make snakes for Mikey's classmates and the pipe cleaner snake was born.

These are good little projects for small hands. I've included pictures along with instructions for you to enjoy.

You will need:
- pipe cleaners
- foam shape stickers
- marker or googly eyes and glue
- gift ribbon
- scissors


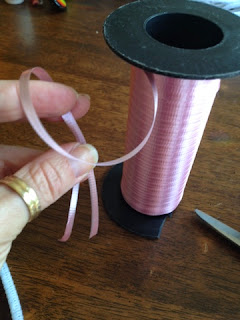
The gift ribbon, gently snipped on the end, can be pulled apart to make the ribbon appropriately sized for a snake tongue.


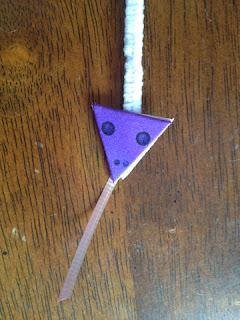
Peel the backing off a foam shape sticker. (Don't throw the backing away!) Place one end of the pipe cleaner onto the sticky side of the shape. Place a piece of ribbon tongue on too.


Place the backing of the sticker onto the shape. This holds the pipe clean and the tongue on. I noticed that the not-so-shiney side works better at sticking back on the foam.


Turn the snake over to get a good look at the head.


Then draw some eyes and nostrils on.


Repeat as needed and voila!